PADI Continued Learning – Search & Recovery Specialty
Preamble
Ok, so one of my annoyances with PADI is that their learning comes off…outdated a lot of the time, and the PADI Search and Recovery Specialty is no exception. PADI is a huge organization that has been around for 56 years and is the primary reason recreational scuba diving is so accessible. But, they have struggled to keep up and modernize until the last few years. The eLearning is only a couple years old and a lot of the material shows its age. But, the data is good and still relative for the most part, and sometimes you just have to laugh when you’re sitting here in 2021 and watching a guy drop a DOS computer off a boat in ‘96.
PADI Search & Recovery – What is it?
The Search & Recovery Specialty course teaches divers how to recover lost items underwater, or how to spot items that don’t belong (bottom-combing). S&R is the art of finding lost things.
Why should you take the Search & Recovery course?
If you want to build your confidence underwater, experiment with some dive accessories, and perhaps fund your scuba addiction as a hobby recovery diver – this course is for you!
Why I took the Search and Recovery Specialty
To be frank, I was not interested in taking the Search & Recovery Specialty. In retrospect, I can’t remember why, but I think it was largely because I still wasn’t totally comfortable under the water. I was still afraid of the compass a little bit, getting lost, and as with everything – I was afraid I wouldn’t be good at it. I took this course for two main reasons:
- The Divemaster course requires an assessment of Search & Recovery Skills, if you have the specialty it counts towards the course.
- At the time I was still short a few dives to begin my Divemaster course. Business was slow because of the pandemia, and I wanted to get my 40 dives in as soon as possible.
Essentially, by taking the course I got extra dives in, a specialty certification, and checked off a box on my DM before I even started!
These are also the reasons I completed the Deep Diver Specialty, and I am happy I did! Not only did I gain more skills and comfort under the water, but it was a treat for me to dive with just Nata and Carsten – it is quite rare that I get to dive with just my instructors. Typically, we are taking clients and I am the tail, so they are not focused on my skills and I am not watching them. By taking these two specialties I had their undivided attention, they were assessing my skills and I got some devoted time to learn from two very experienced divers!
Disclaimer…
Before we go further, I should note that PADI is a Recreational Dive company, so this course is for recreational Search and Recovery. You cannot work as a Recovery Diver with the course. Search and Recovery diving is considered Commercial Diving and requires much more training, safety equipment, etc. Recreational S & R is considered “small to medium sized objects” (PADI Instructor Manual).
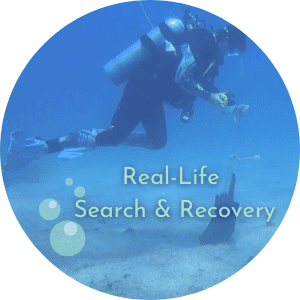
However! Lots of people make pocket money recovery diving for people. As you read in my Real-Life Search & Recovery post, people lose small (phones, golf balls) to medium-sized (anchors, boat motors) objects all the time and would happily compensate you for your time. I am told a generally rule of reimbursement is your costs + 10% of the value of the item. Golf courses hire divers to retrieve balls from the ponds, Cabin owners lose things off their docks, etc.
What is S & R about?
This course encompasses two types S&R. Specific (Search & Recovery of a lost item) and Non-specific (Bottom-combing).
Search and Recovery skills you will learn:
- Orientation (above water)
- The eLearning teaches you strategies to pinpoint the location something was lost in the water, in a scenario where you see the loss take place from the shore.
- Orientation (below water)
- Obviously, this course uses lots of underwater navigation! Its hard to find a lost item if you don’t know where you are
- Search Patterns
- There are different patterns to employ based on the size of the object, conditions, etc.
- Lift Bag
- You will learn how to use a lift bag to raise heavy objects.
- Knot Tying
- We use lift bags, markers, buoys, etc. a lot in this course. You have to learn how to tie 3 knots, underwater, wearing gloves! Here’s a little TikTok I made while practicing my knot tying skills.
- Underwater communication
- Rope pulls, signals, etc.
Diving tools & accessories required:
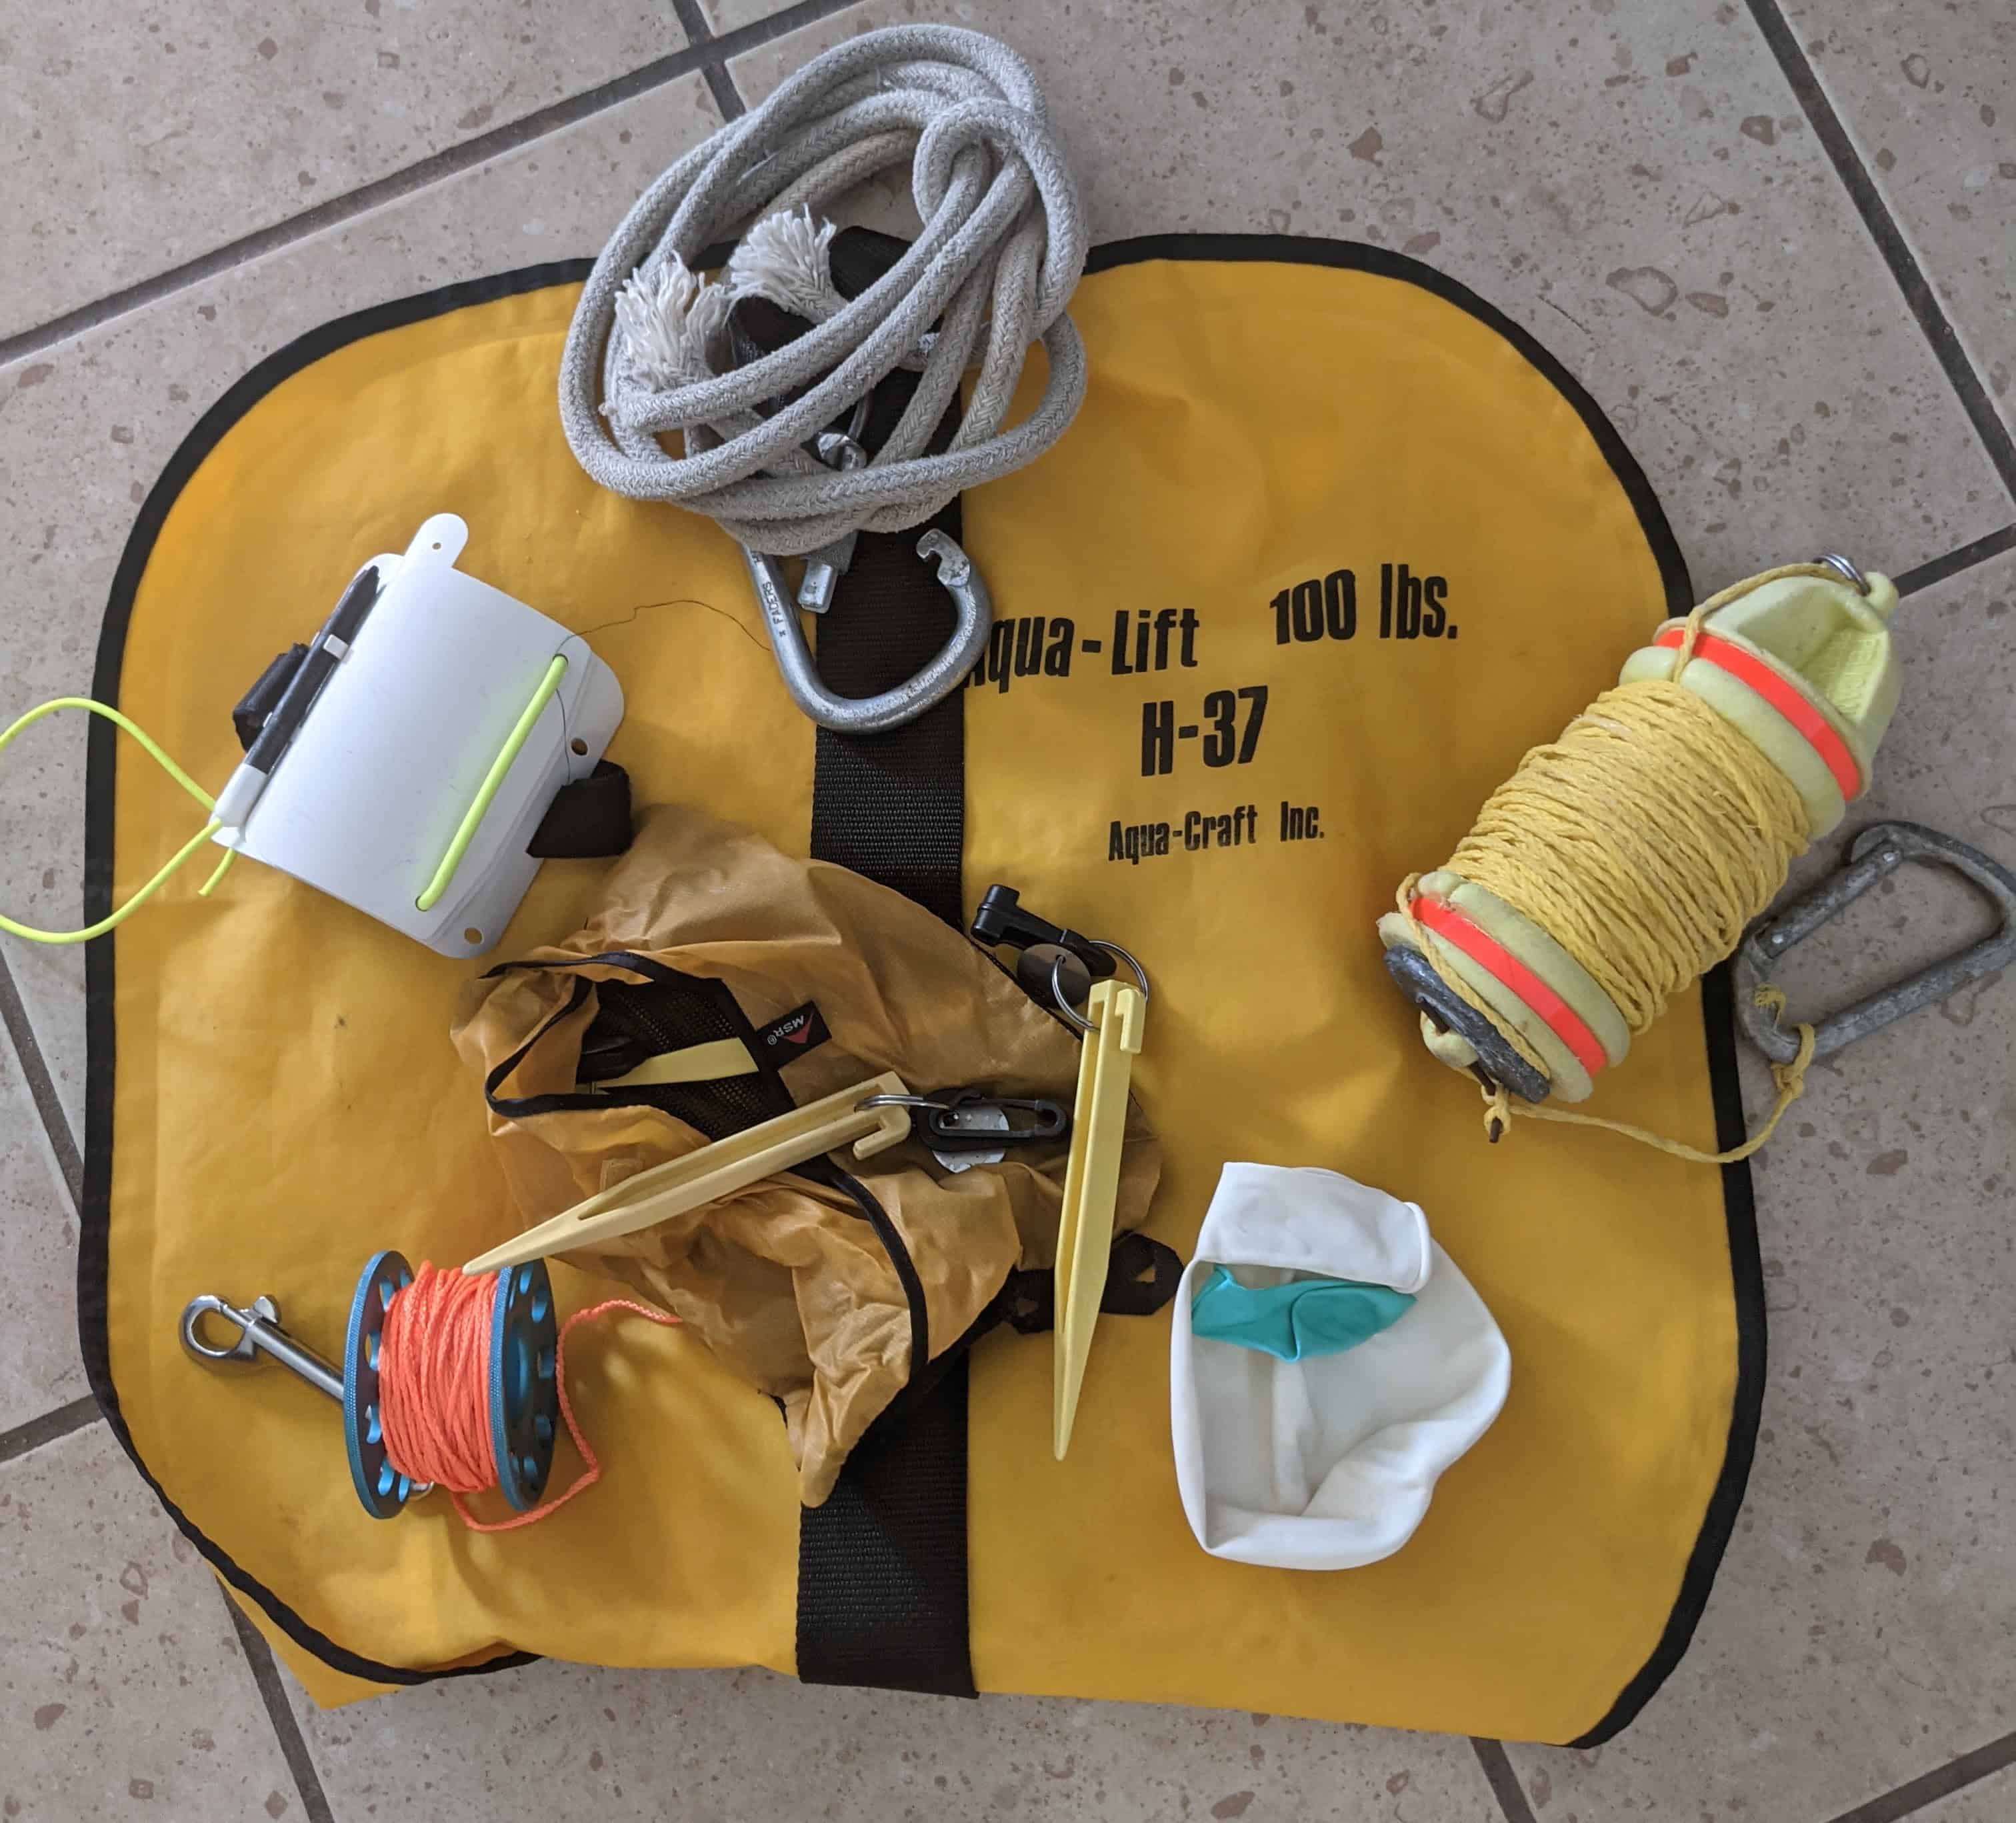
In addition to your usual dive gear, you will need:
- Line & Reel
- Lift Bag
- Bottom Markers (I used tent pegs!)
Optional
- Slate
- Balloons (can be used as markers when you find the item)
You of course already have a line and reel because you always dive with an SMB (right?). I typically dive with my slate because I dive with students or clients all the time and sometimes they forget signals, so its always nice to have the slate as a backup communication device. Additionally, as a student I am always observing and sometimes like to make notes on our dives.
The rest should be provided by the shop you are taking your course through, unless you plan to S & R dive a lot, you probably won’t buy a lift bag (at least not yet!).
The Homework
Like all PADI courses, you can opt for a textbook or the eLearning. As a millennial and nomad I have zero interest in hauling around textbooks, so I opt for eLearning whenever possible. Additionally, since I intend to pursue a professional diving career I value having access to all my past courses at any time. While the technology from PADI is still catching up, I can access all my past courses if I have a laptop and internet connection. Someday soon I’ll be able to access them quickly from my phone too I hope!
The eLearning is not difficult, but you do need to pay attention for the quizzes at the end of each section. I was taking three courses at the same time (Peak Performance Buoyancy, Deep Diver, and Search & Recovery) so I don’t know exactly how much time it took me to complete the homework, but I would guess about 4 hours. As I mentioned earlier, sometimes you just need to be patient with PADI. Some of the training videos are definitely older than I am.
In the Rescue Diver Course, you also learn about search patterns for recovering missing divers so some of this course was review for me. But – since I struggled with the search patterns in the Rescue Course I made myself some flash cards. Its not that the patterns are difficult, but you need to know which pattern is best, according to the conditions, size of the object, etc. and that is what I have a hard time remembering.
Ok – now for the fun part: the actual diving!
Practical Requirements
This course is longer than some of the other specialties, requiring 4 dives, typically over 2 days. Since I am at the shop every day, I was able to practice the search patterns with Carsten on land any time which was super helpful! I highly recommend taking some time to practice all the patterns on line to nail the process in your head, before adding the additional stressors of diving.
NOTE – Task Loading
We talk about this a lot in Scuba. Task loading is when a diver has their attention drawn across too many things (usually newer divers with cameras). This is a HUGE safety concern because they tend to not pay attention to the basics (they are new, still learning) and can run out of air, go too deep, etc.
You reduce task-loading by only adding new tasks when other tasks become natural. When a new diver does not have to think about their buoyancy, monitoring depth and air, then they can add a new task – such as a camera.
By practicing the search patterns on land until they are natural to you, you reduce the load on your brain when doing the patterns underwater while navigating, monitoring your gauges, etc.
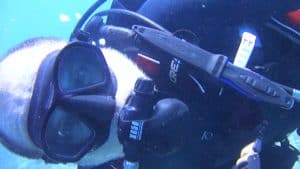
In addition to pattern practice, I also had to learn how to tie some knots! I learned three knots through this course: the bowline, the double half hitch, and the sheet bend. Here is a video of me practicing the bowline knot with my eyes closed, with gloves, and with gloves while my eyes are closed!
Day 1
March 5, 2021
I took this course alone, but we brought along my friend Rossana to be my buddy for the day. Rossana was just certified in January and had about 10 dives at the time, but she was a fantastic Search & Recovery buddy! She was a great help and made the day really fun. It was also fun for me because I got to teach her a few things and she was so excited to be joining us!
Dive #1
Task 1 – Small item search
The first thing we did was a search for a small item, no larger than a baseball in a small area, using the circle pattern. Rossana acted as the anchor (holding the rope) while I swam in circles with the other end. At the beginning of the video, note the beg in the sand. That marks the starting point of the pattern, every time the rope came back around to that marker she would signal me with the rope. Then, I would let out more rope and start the next circle.
Task 2 – Knots
Time to show off my skills! Once we found the item I demonstrated my knot tying skills.
Task 3 – Large-area search
Nata took off and hid a larger, heavy item somewhere. Using a U-pattern search, Rossana and I searched for a larger item.
Note
One thing I appreciated about this course was Nata did not describe to me or show me the items before I looked for them, so I didn’t know exactly what I was looking for. I just had to look for something that didn’t belong on the ocean floor!
Task 3.5 – item removal
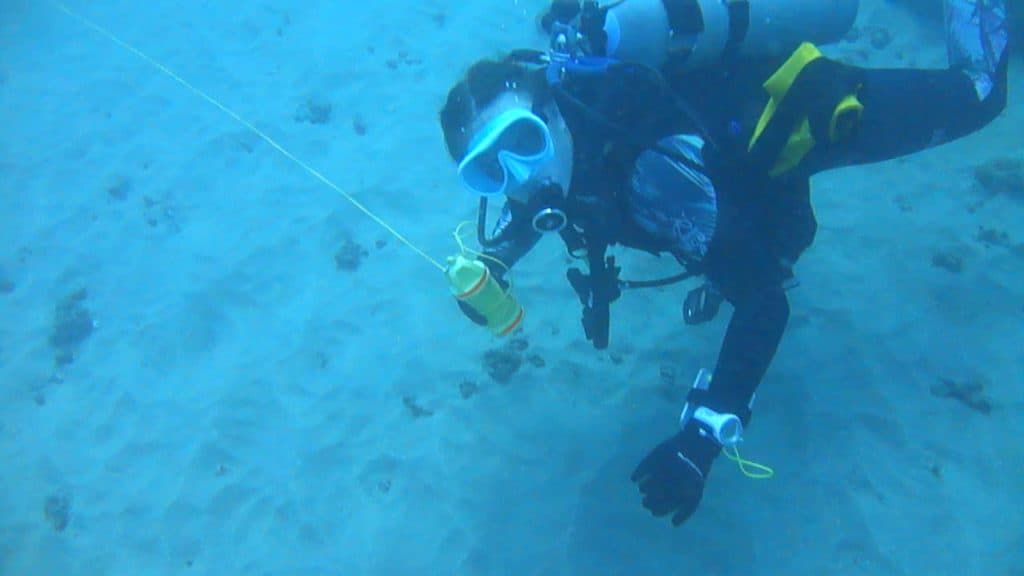
Lifting! The hidden item was a weight belt weighing about 15kg. Its not possible/extremely dangerous to try and lift something so heavy without a tool such as a lifting bag. Once Rossana and I found the item we had to get it to the surface.
Step 1 – Mark it
The first thing we always do is mark the item somehow. That way if something goes wrong (we run out of air and have to come back, the item falls during the lifting process, etc.) we can easily find the object again without having to do another search.
Error – I used a buoy that had 100m of rope. In the PADI video they attach it to the item and let the buoy go, which is what I did. This is also why I had to reel back 100m of rope that was entangled everywhere after my dive.
Step 2 – Lift!
After Attaching the Lift Bag (using my knot tying skills), I add little bits of air from my alternate air source to bring the item to neutral buoyancy. The trick is to add just enough air that you can ascend with the item, but no so much that it flies up to the surface. The bag I was using did not have a release valve, so there is no way to easily remove excess air from the bag as I ascended. Remember, air expands as you ascend and the ambient pressure decreases, so if you fill the bag right up it will skyrocket to the surface. Divers like to have everything under control, so we to ensure a slow, controlled ascent with the object.
Dive Log
Dive #40 Dive Site: La Violin Max Depth: 14.3m Dive Time: 44min Water Temp: 26°c
Dive #2
Task 1 – Expanding Square pattern practice
Item search using an Expanding Square pattern. In my humble opinion, this pattern is the most useless of all the search patterns. It is simple enough, but it’s a little tricky to execute and far too many variables in my opinion. The pattern looks like this:
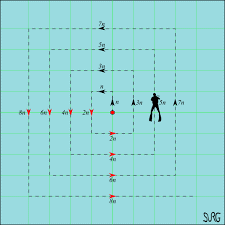
But if you think about it, every time you make a turn there is a margin of error. You move a distance as you kick to turn, compass navigation is difficult to be precise, and if there are even slight currents they can easily push you off course. So maybe this pattern is not useless per se, but it is difficult to get right.
Despite the odds, we found the missing weight belt and I went about getting it to the surface again. This time would be better!
Note
A hot tip Carsten gave me to help with navigation – using environmental markers. When you set your coordinates and are following your compass, look for rocks, shells, anything in line with your compass reading. This will keep you from moving laterally at all with the currents, kicks, etc. which happens very easily and make your navigation that much more accurate.
Task 1.5 – Item removal take #2
This lift went so much better and so much worse than the first one:
Better
If you watch the video below (I am very proud of this), you will see that I check my watch before letting out the buoy line. I checked my depth, and then count arm spans (about 1.5m) of rope, before securing the rope to the buoy at that length. That way it would just reach the surface and not let out oodles of line. Brilliant, I know.
You can tell the difference in my buoyancy too. I stay in mostly the same spot as I’m working with the bag. In the first dive I kind of swam circles around it and got tangled in the rope.
Worse
Just watch. First, and I felt this happening just before it did, as I unclipped the lift bag from my BCD, the lift bag came off the carabiner and floated to the surface. Good thing I had already placed that surface marker – because I had to surface to get the bag.
I was extra careful filling the bag this time, I really wanted to nail the buoyancy. But I was sooooooo slow. Nata even stopped recording I was taking so long.
Another note is that it is good practice to tie the bag close to the item. You can see I tied the bag to one end of the rope and the other end of the rope to the weight belt. It would be better if the bag and the belt were closer together.
That’s it! After I brought the item up to Javi I descended again and the four of us did a little fun dive around my favourite site – La Blanca!
Dive Log
Dive #41 Dive Site: La Blanca Max Depth: 13.6m Dive Time: 51min Water Temp: 27°c
Day #2
April 9, 2021
When I started this course, things were slow around the shop so we had no problem picking a day to go out on the boat. Then suddenly we were busy, and I mean booked! For weeks we had students and certified divers filling our days. It took 5 weeks for us to have the time to do the second day of my Search & Recovery course! The first dive of this course was my first official DMT dive (#40), and the second day of this course was after I got my required 60! How fun is that.
Because it had been so long since I did the eLearning or the first two dives I was a little nervous, but also I think it was great because it really solidified the learning in my long-term memory having so much space between dives. Carsten was my buddy today!
I don’t have any footage from this day, so you will just have to trust that I did everything perfectly.
Dive #3
This was fun because it was completely new territory today – the Jackstay search pattern! This is one I have never practiced before. It is used for finding smaller objects in poor visibility, so its nots something we use in the Rescue Course.

There are two types of Jackstay, the one shown here, and an alternate where instead of both divers moving the line, only one diver does. This creates a diagonal pattern. It is a little more thorough and can be used for really small objects or really poor visibility.
The conditions at Maguey were not good, so it was very realistic. The vis was maybe 2-3m. Carsten and I descended, and then swam apart for 15 kick cycles – so we were about 30m apart. We set our pegs, gave our signals, and began the search!
Note
In diving we measure distance in kick cycles – starting in an “open scissor” position, perform one scissor kick with each leg, when your legs return to the original position, that is one kick cycle. You travel roughly one metre per kick cycle.
In our version of the Jackstay we swam down the line together, on opposite sides of the rope so we met in the middle. Once we reached our respective sides, we moved the line 3 arm-lengths, placed the markers, and signalled we were ready.
Note – Rope Signals
PADI teaches you examples of up to 10 different signals with rope pulls. In my opinion that is way too many. Simple is always better, and when you are in stressful situations, under pressure (literally and figuratively) you need things your brain is going to remember easily (remember our task-loading talk from earlier). If you have 10 different signals, and continuous pulls is your signal for emergencies, it will take 11 or 12 pulls on the rope for you or your buddy to register an emergency. That is a lot of time wasted, and can be stressful. Also, its hard to count! You are always pulling on the rope to be sure it is taught, so how do you know if it is one pull or two. Or four or five if you missed the first?
Anyway. In my opinion 3 signals is the sweet spot, and definitely no more than 5. 3 plus continuous pulls meaning meet up. This could be an emergency or that you found the item. Regardless, you need to rejoin your buddy.
After two or three pattern cycles, the visibility improved a little bit so when I met Carsten in the middle of our next swim, I signalled that we should increase to 4 arm lengths. I’m glad we did, because it was still another 4 or 5 repetitions before we found the object!
By my estimates, we found the object about 45m from our starting point, we did the pattern about 6 times. This put us into the middle of Maguey Bay, so we inflated the lift bag just enough to make it neutrally buoyant, then swam it back towards our boat and away from boat traffic before ascending.
This was great practice. After these three course dives and all the other diving I have done over the last 5 weeks, I am feeling SO much more confident underwater. The compass is becoming second nature to me (so I’ll be ready for more tasks soon!). This makes me feel so much more confident about guiding too.
Dive Log
Dive #61 Dive Site: Maguey Max Depth: 12.5m Dive Time: 35min Temp: 22
Dive #4
Last dive! This dive is treated as a scenario. Nata discreetly “looses” something off the boat, and I have to ask the questions, determine the pattern, delegate tasks, and control the scene! To my surprise I was actually excited about it, not nervous at all.
As we entered La Violin, Nata jokingly told us he lost the same item we had JUST found for him at Maguey. We were tied up at the buoy, but based on Nata’s story I asked Javi to take us closer to the mouth of the bay, other wise it would have been a long surface swim!
Carsten and I bailed in close to the rocks and started a U-Search pattern running parallel the cove and expanding outwards to the sandy area of the bay. Within two cycles I spotted the “missing item” about 20m to my left – towards the centre of the bay. Everything went swimmingly! I attached my buoy, tied on the lift bag, and began our ascent. I wanted to do a safety stop this time, so I made sure to hold on to the buoy line so if the lift bag began to ascend too fast I could still control it.
Why U-Pattern?
The vis was pretty good, about 7m, and we were looking for a medium-large item in a fairly large area with large rocks. The U-Pattern search is the best in this scenario.
It was all going so perfect, as we hit 6m the bag started ascending and I couldn’t let the air out, so I held on to the buoy line to guide it up. Suddenly, I felt a weird sliiiiidee – pull! On the rope. I thought it was weird, but everything seemed fine. I could see the bag and weight belt at the surface, and the line that was…floating away. The buoy rope I was using to control the item had ones been tied to the carabiner, but was completely frayed and had snapped off as the bag floated to the surface.
SO close to a perfect run. Ah well. I ascended slowly and tied the rope back on to the weight belt and waited for Carsten to finish his safety stop. I had not exceeded any limits and was completely safe without doing the stop, but its common/best practice to always do a safety stop at the end of a dive.
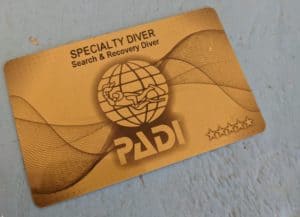
And that’s it! I now have my Search & Recovery Specialty!
Dive Log
Dive #62 Dive Site: La Violin Max Depth : 15.6m Dive Time: 14min Water Temp: 22°c
Since the dive was so short I had tons of air left, so Nata hung out on the boat while Carsten and I descended again to make notes for my Mapping Project – another requirement of the Divemaster program. I will tell you all about that project soon – it was a doozy!
Overall, I enjoyed the course MUCH more than I anticipated. Going in I didn’t think I had any interest in Search & Recovery, but of course all dive courses are about so much more than the base material. Every dive continues to sharpen all your underwater skills.
Biggest Take-aways
- Underwater Navigation.
- Both the land and underwater practice made me SO much more comfortable with underwater navigation. Not only being totally comfortable with the compass, but learning to treat navigation the same as I do my other basic skills. Its natural and a part of the rest of what I do. The point of S&R is to look around you, look up look out, pay attention to everything outside your bubbles. Now I naturally use my compass on every dive, am much more aware of my surroundings, and feel like I always know where the boat is.
- Comfort with additional tasks
- The task-loading thing again. I feel comfortable being responsible for more things underwater. I can know my depth, my air, my direction, and count kick cycles all at the same time!
- Comfort with kit.
- If my biggest takeaway from the Rescue Course was comfort with my own gear, then S&R taught me greater comfort with more gear. Wearing the lift bag, the peg bag, the buoy, my SMB and reel are new to me too, all of this additional gear would have made me feel claustrophobic only a few weeks earlier. But I felt comfortable with all of it by the end of the course.
If you would like more info on the course you can check out PADI’s course overview here. Obviously I think you should sign up with the course through Hurricane Divers. You can check out their services here!
This is my first course review – I hope you found it helpful! All of the tasks and dives I mention are straight from the PADI Specialty Instructor Course Outlines, but every shop and every instructor is different, so your experience will for sure vary from mine! But all of the same skills should be included. I would love to hear about your Search and Recovery experience, or other specialties you really appreciated!
As always, thanks for strolling,
Shev.